Piezoelectric umferðarskynjari fyrir AVC (sjálfvirk ökutækjaflokkun)
Stutt lýsing:
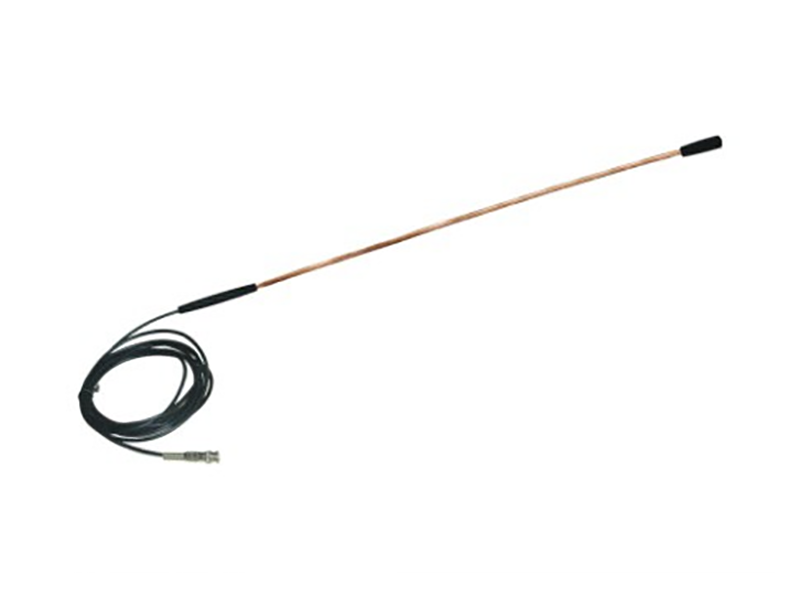
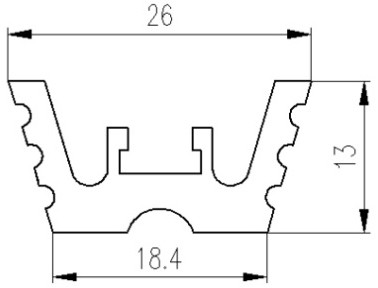
CET8311 greindur umferðarskynjari er hannaður fyrir varanlega eða tímabundna uppsetningu á veginum eða undir veginum til að safna umferðargögnum.Einstök uppbygging skynjarans gerir það að verkum að hægt er að festa hann beint undir veginn í sveigjanlegu formi og lagast þannig að útlínum vegarins.Flat uppbygging skynjarans er ónæm fyrir veghljóði sem stafar af beygju á yfirborði vegarins, aðliggjandi akreinum og beygjubylgjum sem nálgast ökutækið.Lítill skurður á gangstéttinni dregur úr skemmdum á yfirborði vegarins, eykur uppsetningarhraða og dregur úr magni fúgu sem þarf til uppsetningar.
Upplýsingar um vöru
Vörumerki
Kynning
CET8311 greindur umferðarskynjari er hannaður fyrir varanlega eða tímabundna uppsetningu á veginum eða undir veginum til að safna umferðargögnum.Einstök uppbygging skynjarans gerir það að verkum að hægt er að festa hann beint undir veginn í sveigjanlegu formi og lagast þannig að útlínum vegarins.Flat uppbygging skynjarans er ónæm fyrir veghljóði sem stafar af beygju á yfirborði vegarins, aðliggjandi akreinum og beygjubylgjum sem nálgast ökutækið.Lítill skurður á gangstéttinni dregur úr skemmdum á yfirborði vegarins, eykur uppsetningarhraða og dregur úr magni fúgu sem þarf til uppsetningar.
Kosturinn við CET8311 greindur umferðarskynjara er að hann getur fengið nákvæmar og sértækar upplýsingar, svo sem nákvæmar hraðamerki, kveikjumerki og flokkunarupplýsingar.Það getur endurspeglað tölfræði umferðarupplýsinga í langan tíma, með góðum árangri, miklum áreiðanleika og auðveldri uppsetningu.Hár kostnaður frammistöðu, aðallega notað til að greina ásnúmer, hjólhaf, eftirlit með hraða ökutækis, flokkun ökutækja, kraftmikla vigtun og önnur umferðarsvæði.
Heildarvídd

Dæmi: L=1,78 metrar;Lengd skynjarans er 1,82 metrar;Heildarlengd er 1,94 metrar
| Lengd skynjara | Sýnileg koparlengd | Heildarlengd (þar á meðal endar) |
| 6'(1,82m) | 70''(1,78m) | 76''(1,93m) |
| 8'(2,42m) | 94''(2,38m) | 100''(2,54m) |
| 9'(2,73m) | 106''(2,69m) | 112''(2,85m) |
| 10'(3,03m) | 118''(3,00m) | 124''(3,15m) |
| 11'(3,33m) | 130''(3,30m) | 136''(3,45m) |
Tæknilegar breytur
| Gerð nr. | QSY8311 |
| Hlutastærð | ~3×7 mm2 |
| Lengd | hægt að aðlaga |
| Piezoelectric stuðull | ≥20pC/N Nafngildi |
| Einangrunarþol | >500MΩ |
| Jafngild rýmd | ~6,5nF |
| Vinnuhitastig | -25 ℃~60 ℃ |
| Viðmót | Q9 |
| Festingarfesting | Festu festingarfestinguna með skynjaranum (Nylon efni ekki endurunnið).1 stk festing hver 15 cm |
Undirbúningur uppsetningar
Val á vegarkafla:
a) Krafa um vigtunarbúnað: Langtímastöðugleiki og áreiðanleiki
b)Krafa á veglagi: Stífleiki
Aðferð við uppsetningu
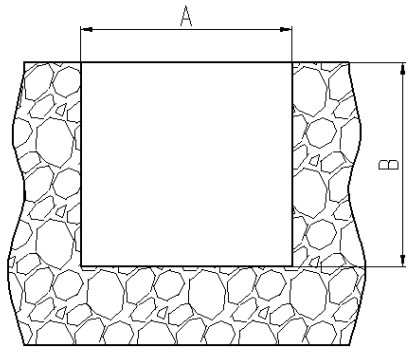
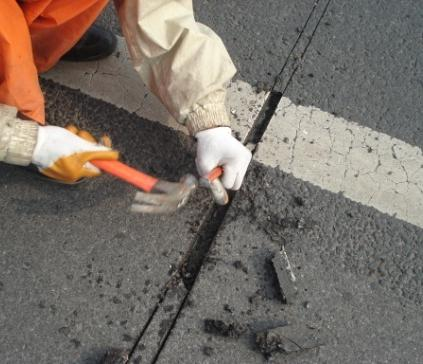
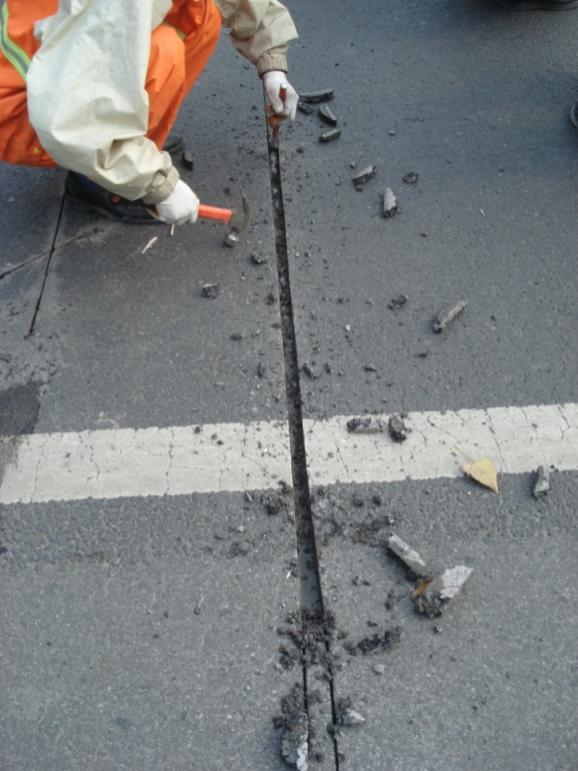
5.1 Skurðarrauf:
5.2 Hrein og þurr þrep
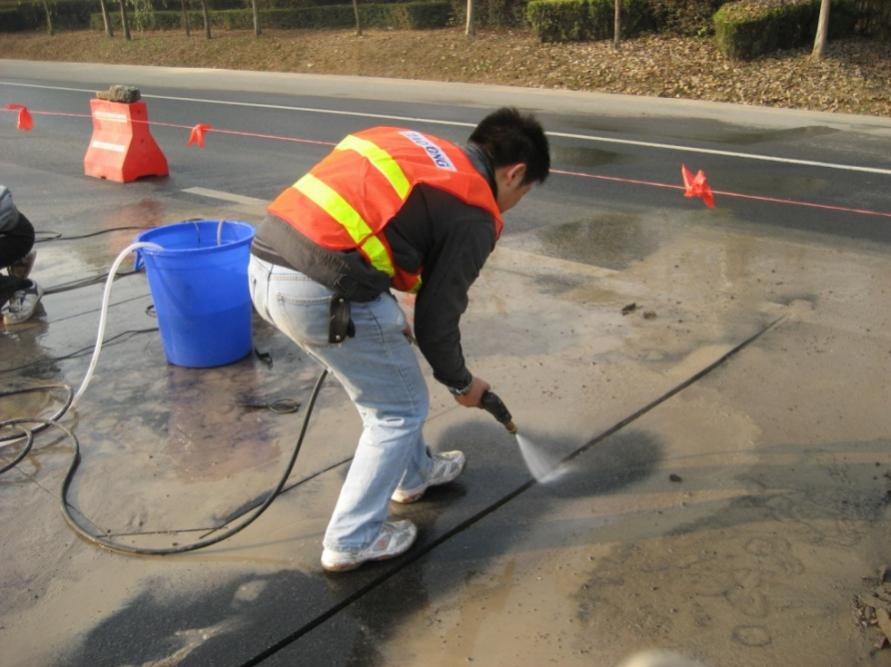
1, Til að tryggja að hægt sé að sameina pottaefnið vel við yfirborð vegarins eftir fyllingu, ætti að þvo uppsetningarraufina með háþrýstihreinsi og þvo yfirborð grópsins með stálbursta og loftþjöppu/háþrýstingsloftbyssa eða blásari er notuð eftir hreinsun til að þurrka vatnið.
2, Eftir að ruslið hefur verið hreinsað, ætti að þrífa fljótandi ösku á byggingaryfirborðinu líka.Ef það er uppsöfnuð vatn eða augljós sýnilegur raki, notaðu loftþjöppu (háþrýstingsloftbyssu) eða blásara til að þurrka það.
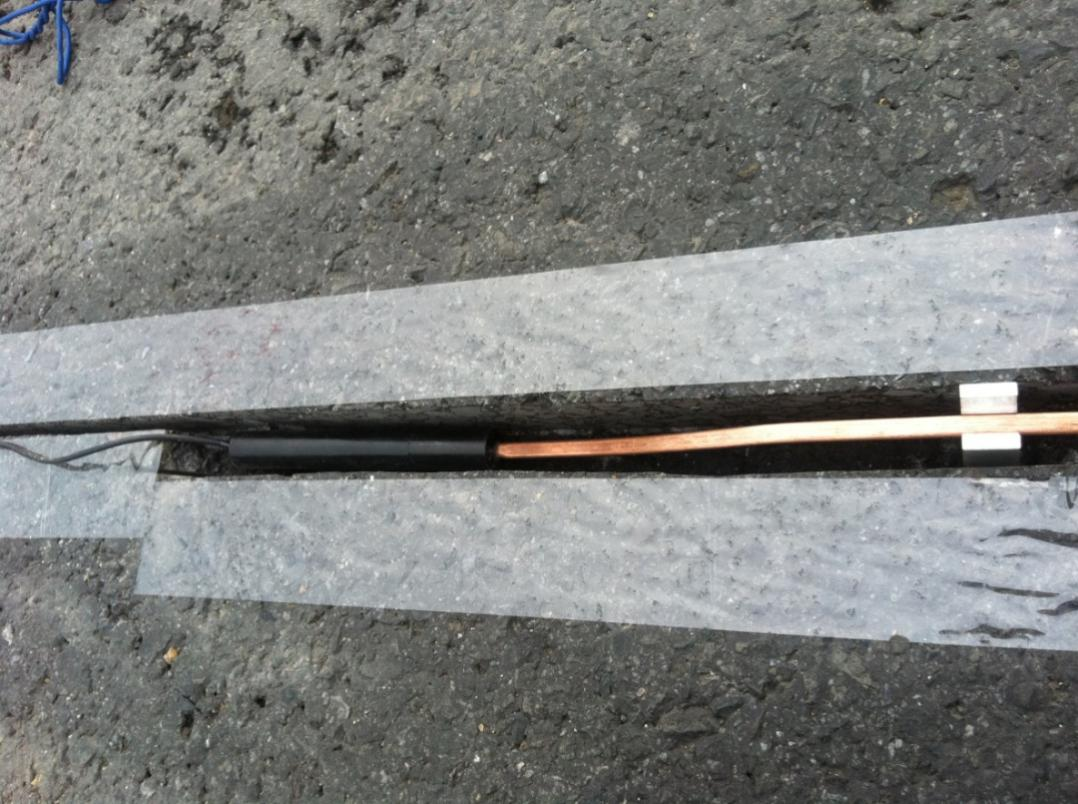
3, Eftir að hreinsun er lokið er þéttiband (breidd meiri en 50 mm) sett á
við yfirborð vegarins í kringum hakið til að koma í veg fyrir mengun í fúgunni.
5.3 Próf fyrir uppsetningu
1, Próf rýmd: Notaðu stafræna fjölmæli til að mæla heildarrýmd skynjarans með snúruna áfastri.Mælt gildi ætti að vera innan þess bils sem tilgreint er af samsvarandi lengdarskynjara og kapalgagnablaði.Drægni prófunartækisins er venjulega stillt á 20nF.Rauði rannsakandi er tengdur við kjarna kapalsins og svarti rannsakandi er tengdur við ytri skjöldinn.Athugaðu að þú ættir ekki að halda báðum endum tengingarinnar á sama tíma.
2, Prófviðnám: Mældu viðnámið í báðum endum skynjarans með stafrænum fjölmæli.Mælirinn ætti að vera stilltur á 20MΩ.Á þessum tíma ætti lesturinn á úrinu að fara yfir 20MΩ, venjulega gefið til kynna með „1“.
5.4 Festa festingarfestingu
5.5 Blandið fúgu saman
Athugið: Vinsamlegast lesið leiðbeiningar um fúguna vandlega áður en blandað er.
1) Opnaðu pottfúguna, í samræmi við áfyllingarhraða og nauðsynlegan skammt, það er hægt að framkvæma það í litlu magni en nokkrum sinnum til að forðast sóun.
2) Undirbúið hæfilegt magn af pottfúgu í samræmi við tilgreint hlutfall og hrærið jafnt með rafmagns hamarhræru (um það bil 2 mínútur).
3)Eftir undirbúning, vinsamlegast notaðu upp innan 30 mínútna til að forðast storknun í fötunni.
5.6Fyrstu skref áfyllingar á fúgu
1) Hellið fúgunni jafnt eftir endilöngu rifunni.
2) Við fyllingu er hægt að mynda frárennslisportið handvirkt til að auðvelda stjórn á hraða og stefnu meðan á hella stendur.Til að spara tíma og líkamlegan styrk er hægt að hella því með smærri ílátum, sem er þægilegt fyrir marga að vinna á sama tíma.
3) Fyrsta fyllingin ætti að vera fylltar raufar og gera fúguyfirborðið aðeins hærra en slitlagið.
4) Sparaðu tíma eins mikið og mögulegt er, annars storknar fúgan (þessi vara hefur venjulegan þurrkunartíma 1 til 2 klukkustundir).
5.7 Önnur áfyllingarskref fyrir fúgu
Eftir að fyrsta fúgan hefur í grundvallaratriðum læknað skaltu fylgjast með yfirborði fúgunnar.Ef yfirborðið er lægra en vegyfirborðið eða yfirborðið er dælt skaltu blanda fúgunni aftur (sjá skref 5.5) og gera seinni fyllinguna.
Önnur fyllingin á að tryggja að yfirborð fúgunnar sé aðeins fyrir ofan vegyfirborðið.
5.8Yfirborðsslípa
Eftir uppsetningu skrefi 5.7 er lokið í hálftíma og fúgan byrjar að storkna, reif bönd af hliðum raufanna.
Eftir uppsetningu skref 5.7 er lokið í 1 klukkustund, og fúgan storknað alveg, mala
fúa með hornsvörn til að láta hana jafna við yfirborð vegarins.
5.9 Þrif á staðnum og prófun eftir uppsetningu
1) Hreinsaðu upp fúguleifar og annað rusl.
2) Próf eftir uppsetningu:
(1) Prófunarrýmd: notaðu stafrænan margfeldismæli til að mæla heildarrýmd skynjarans með snúruna áfastri.Mælt gildi ætti að vera innan þess bils sem tilgreint er af samsvarandi lengdarskynjara og kapalgagnablaði.Drægni prófunartækisins er venjulega stillt á 20nF.Rauði rannsakandi er tengdur við kjarna kapalsins og svarti rannsakandi er tengdur við ytri skjöldinn.Gætið þess að halda ekki endum tenginganna tveggja á sama tíma.
(2) Prófunarviðnám: notaðu stafrænan margfeldismæli til að mæla viðnám skynjarans.Mælirinn ætti að vera stilltur á 20MΩ.Á þessum tíma ætti lesturinn á úrinu að fara yfir 20MΩ, venjulega gefið til kynna með „1“.
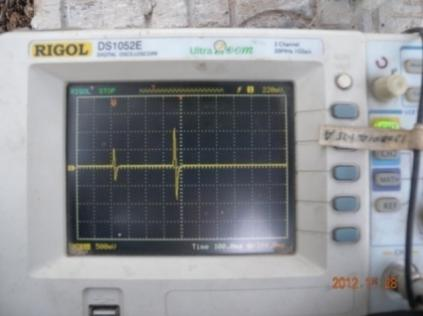
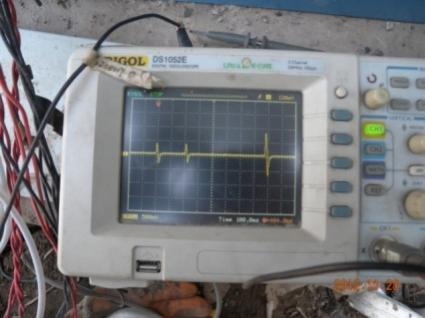
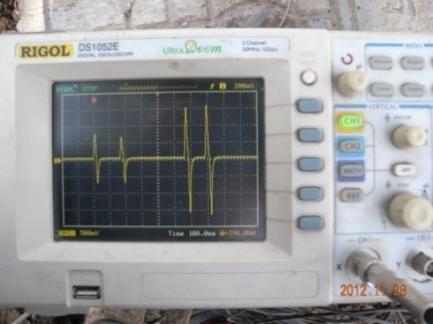
(3) Forhleðslupróf: eftir að uppsetningarflöturinn hefur verið hreinsaður skaltu tengja úttak skynjarans við sveiflusjána.Dæmigerð stilling sveiflusjáarinnar er: Spenna 200mV/div, Tími 50ms/div.Fyrir jákvæða merkið er kveikjuspennan stillt á um það bil 50mV.Dæmigert bylgjulögun vörubíls og bíls er safnað sem forhleðsluprófunarbylgjuformi og síðan er prófbylgjuformið geymt og afritað til prentunar og varanlega vistað.Framleiðsla skynjarans fer eftir uppsetningaraðferðinni, lengd skynjarans, lengd kapalsins og innfellingarefninu sem notað er.Ef forhleðsluprófið er eðlilegt er uppsetningunni lokið.
3) Umferðarlosun: athugasemdir: Umferð er aðeins hægt að hleypa út þegar pottaefnið er að fullu hert (um 2-3 klst. eftir síðustu fyllingu).Ef umferðin losnar þegar pottaefnið er ófullkomið harðnað mun það skemma uppsetninguna og valda því að skynjarinn bilar of snemma.
Forhlaða prófbylgjuform
2 ásar
3 ásar
4 ása
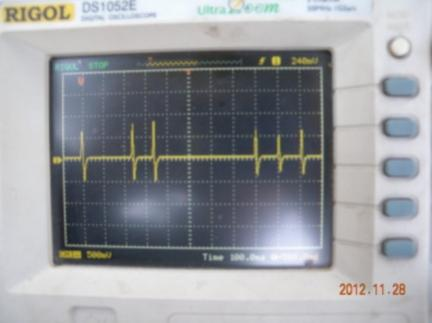
6 ásar

